I write about the things I find interesting. It’s really random stuff.
-
I ran into an issue with this migration from Ubuntu Server 18.04 LTS to Ubuntu Server 24.04 LTS because I decided to get rid of my hybrid Nginx-Apache reverse proxy install and use straight up Nginx. When setting the permalinks…
-
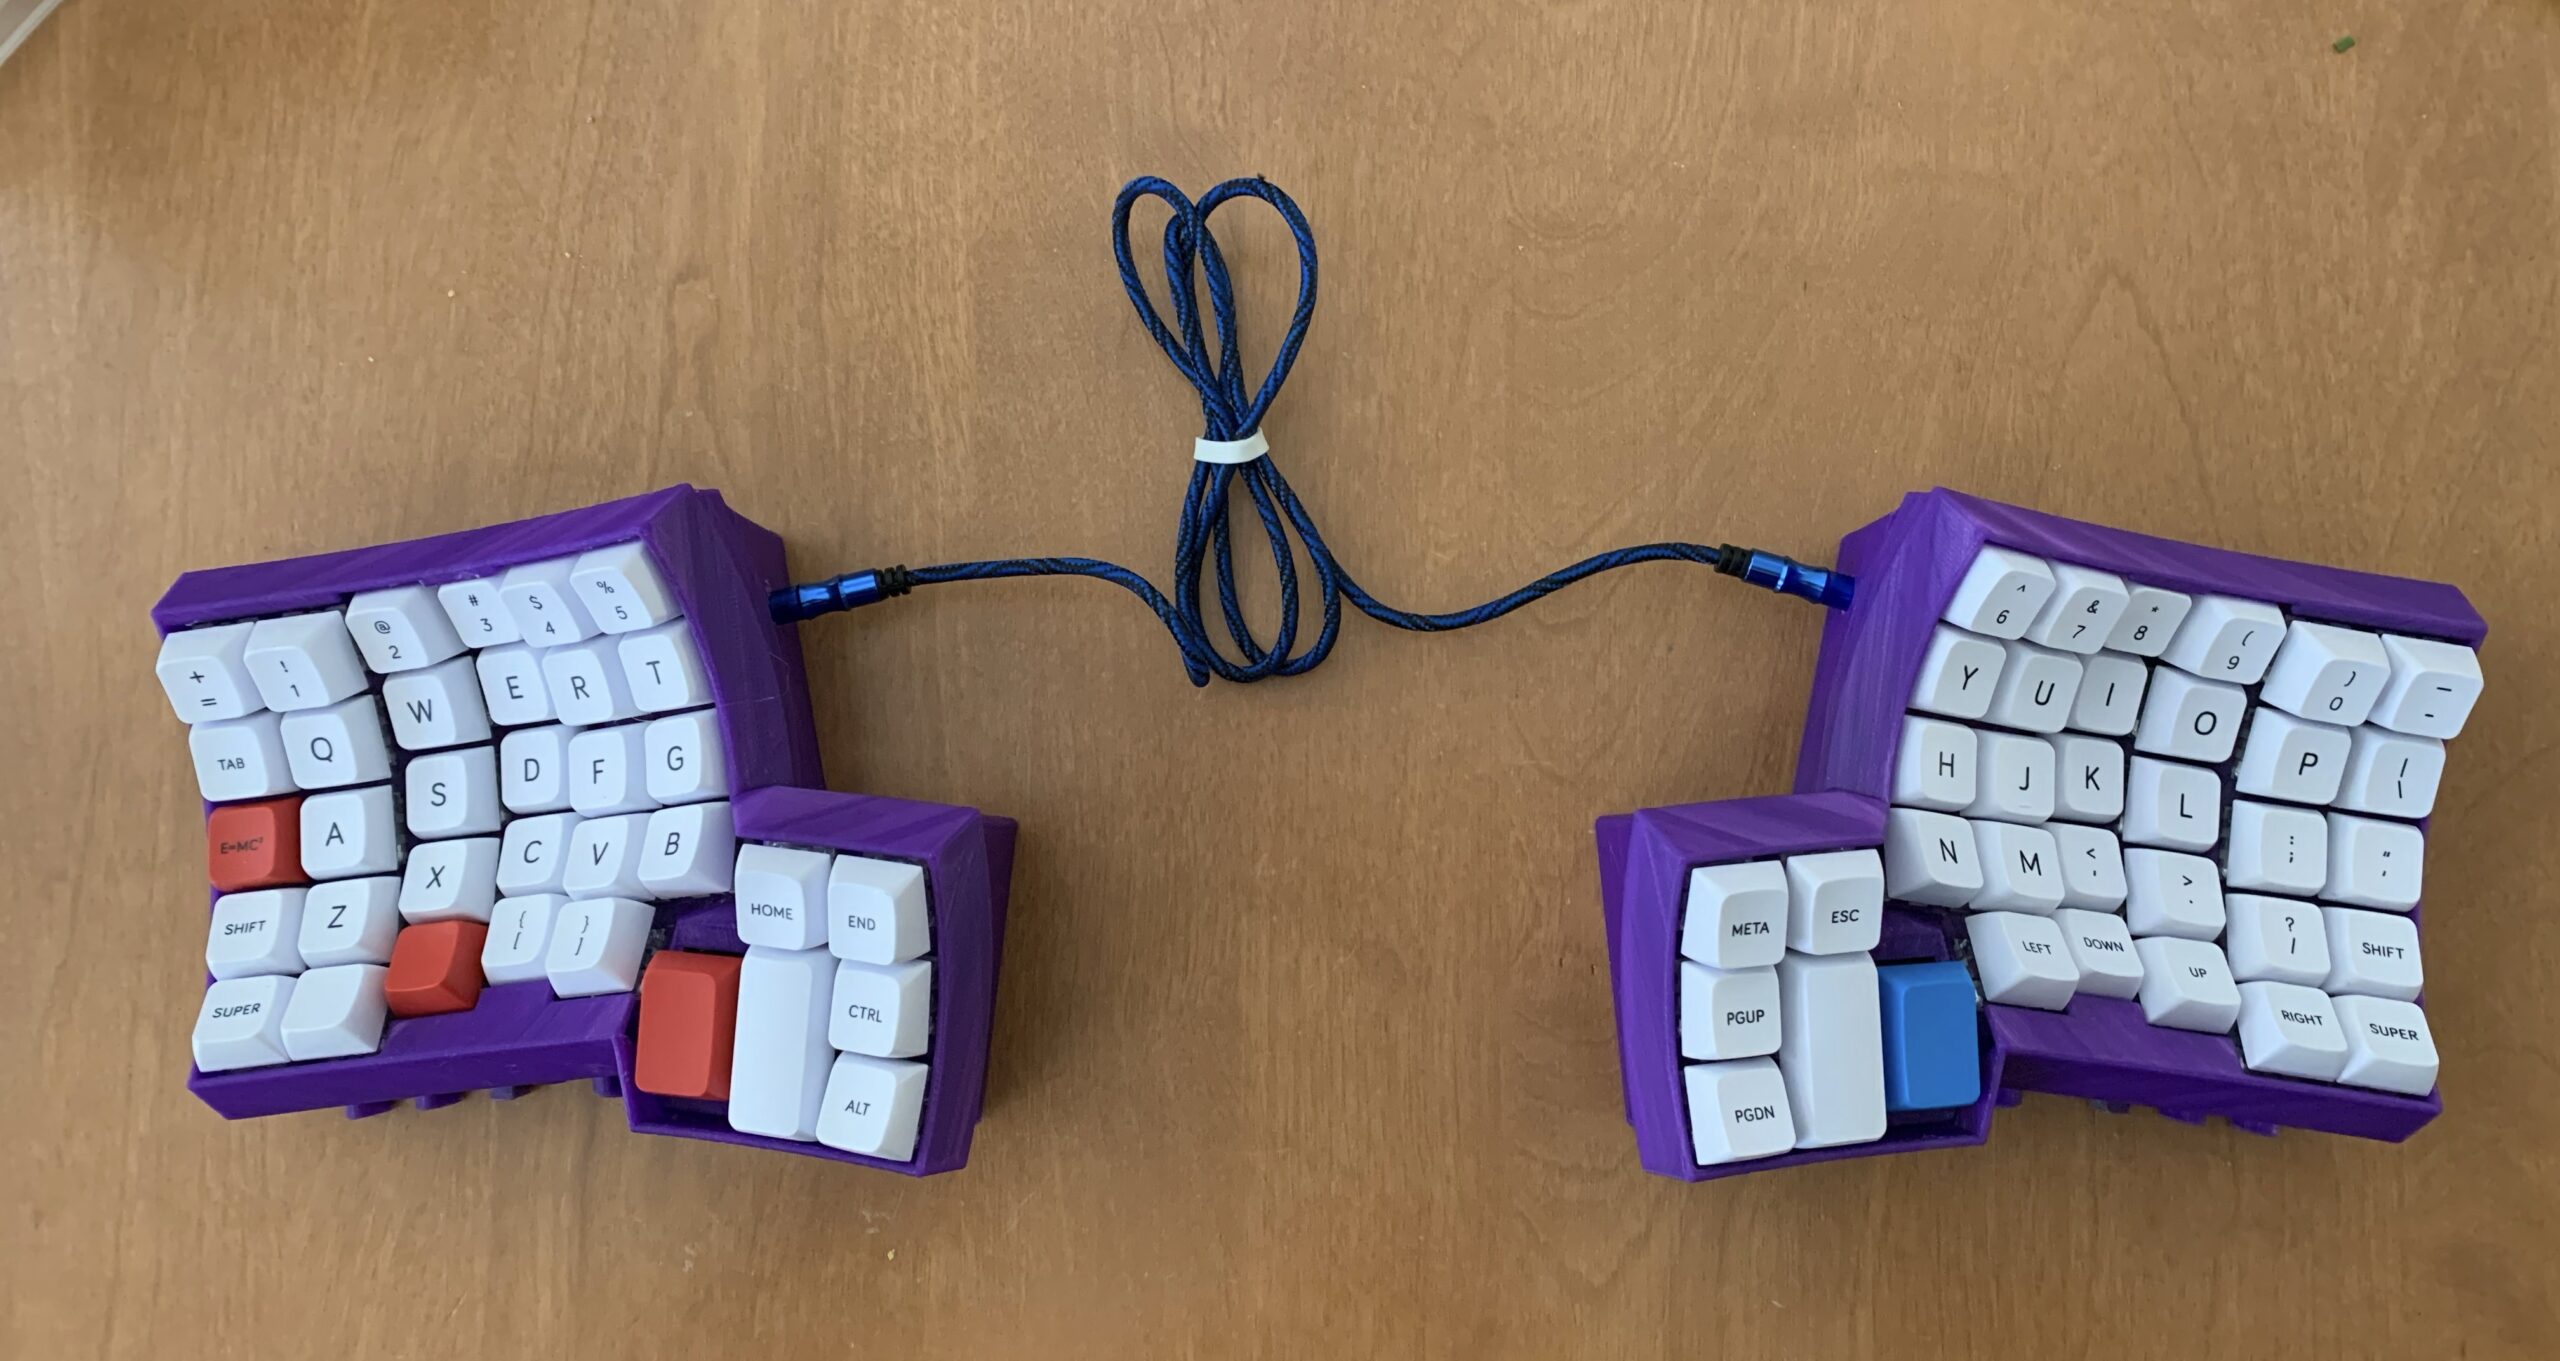
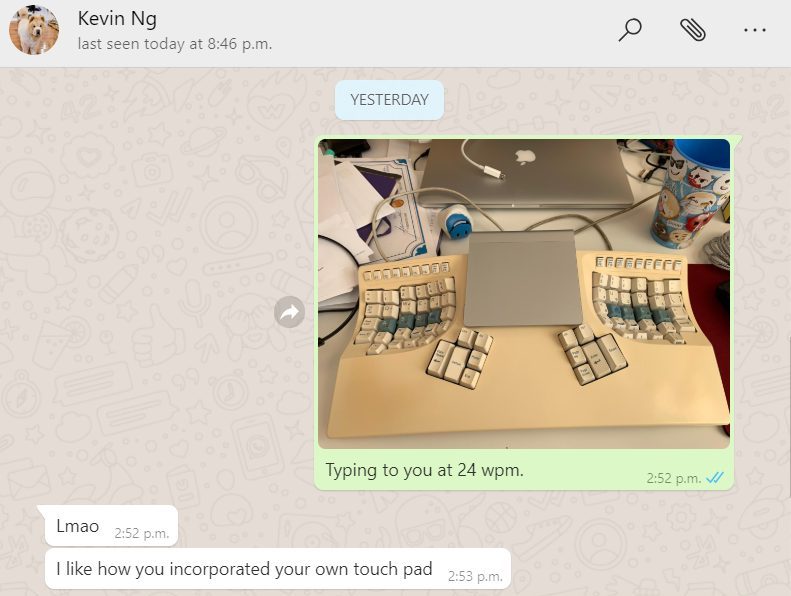
Building a Dactyl Lightcycle Keyboard
NOTE FROM AUTHOR [2024/05/07]: This post was originally written in 2022, but sat unpublished. I used this keyboard on and off for about 2 years. I still like the layout of the Kinesis better, but I can use either fluently.…
-
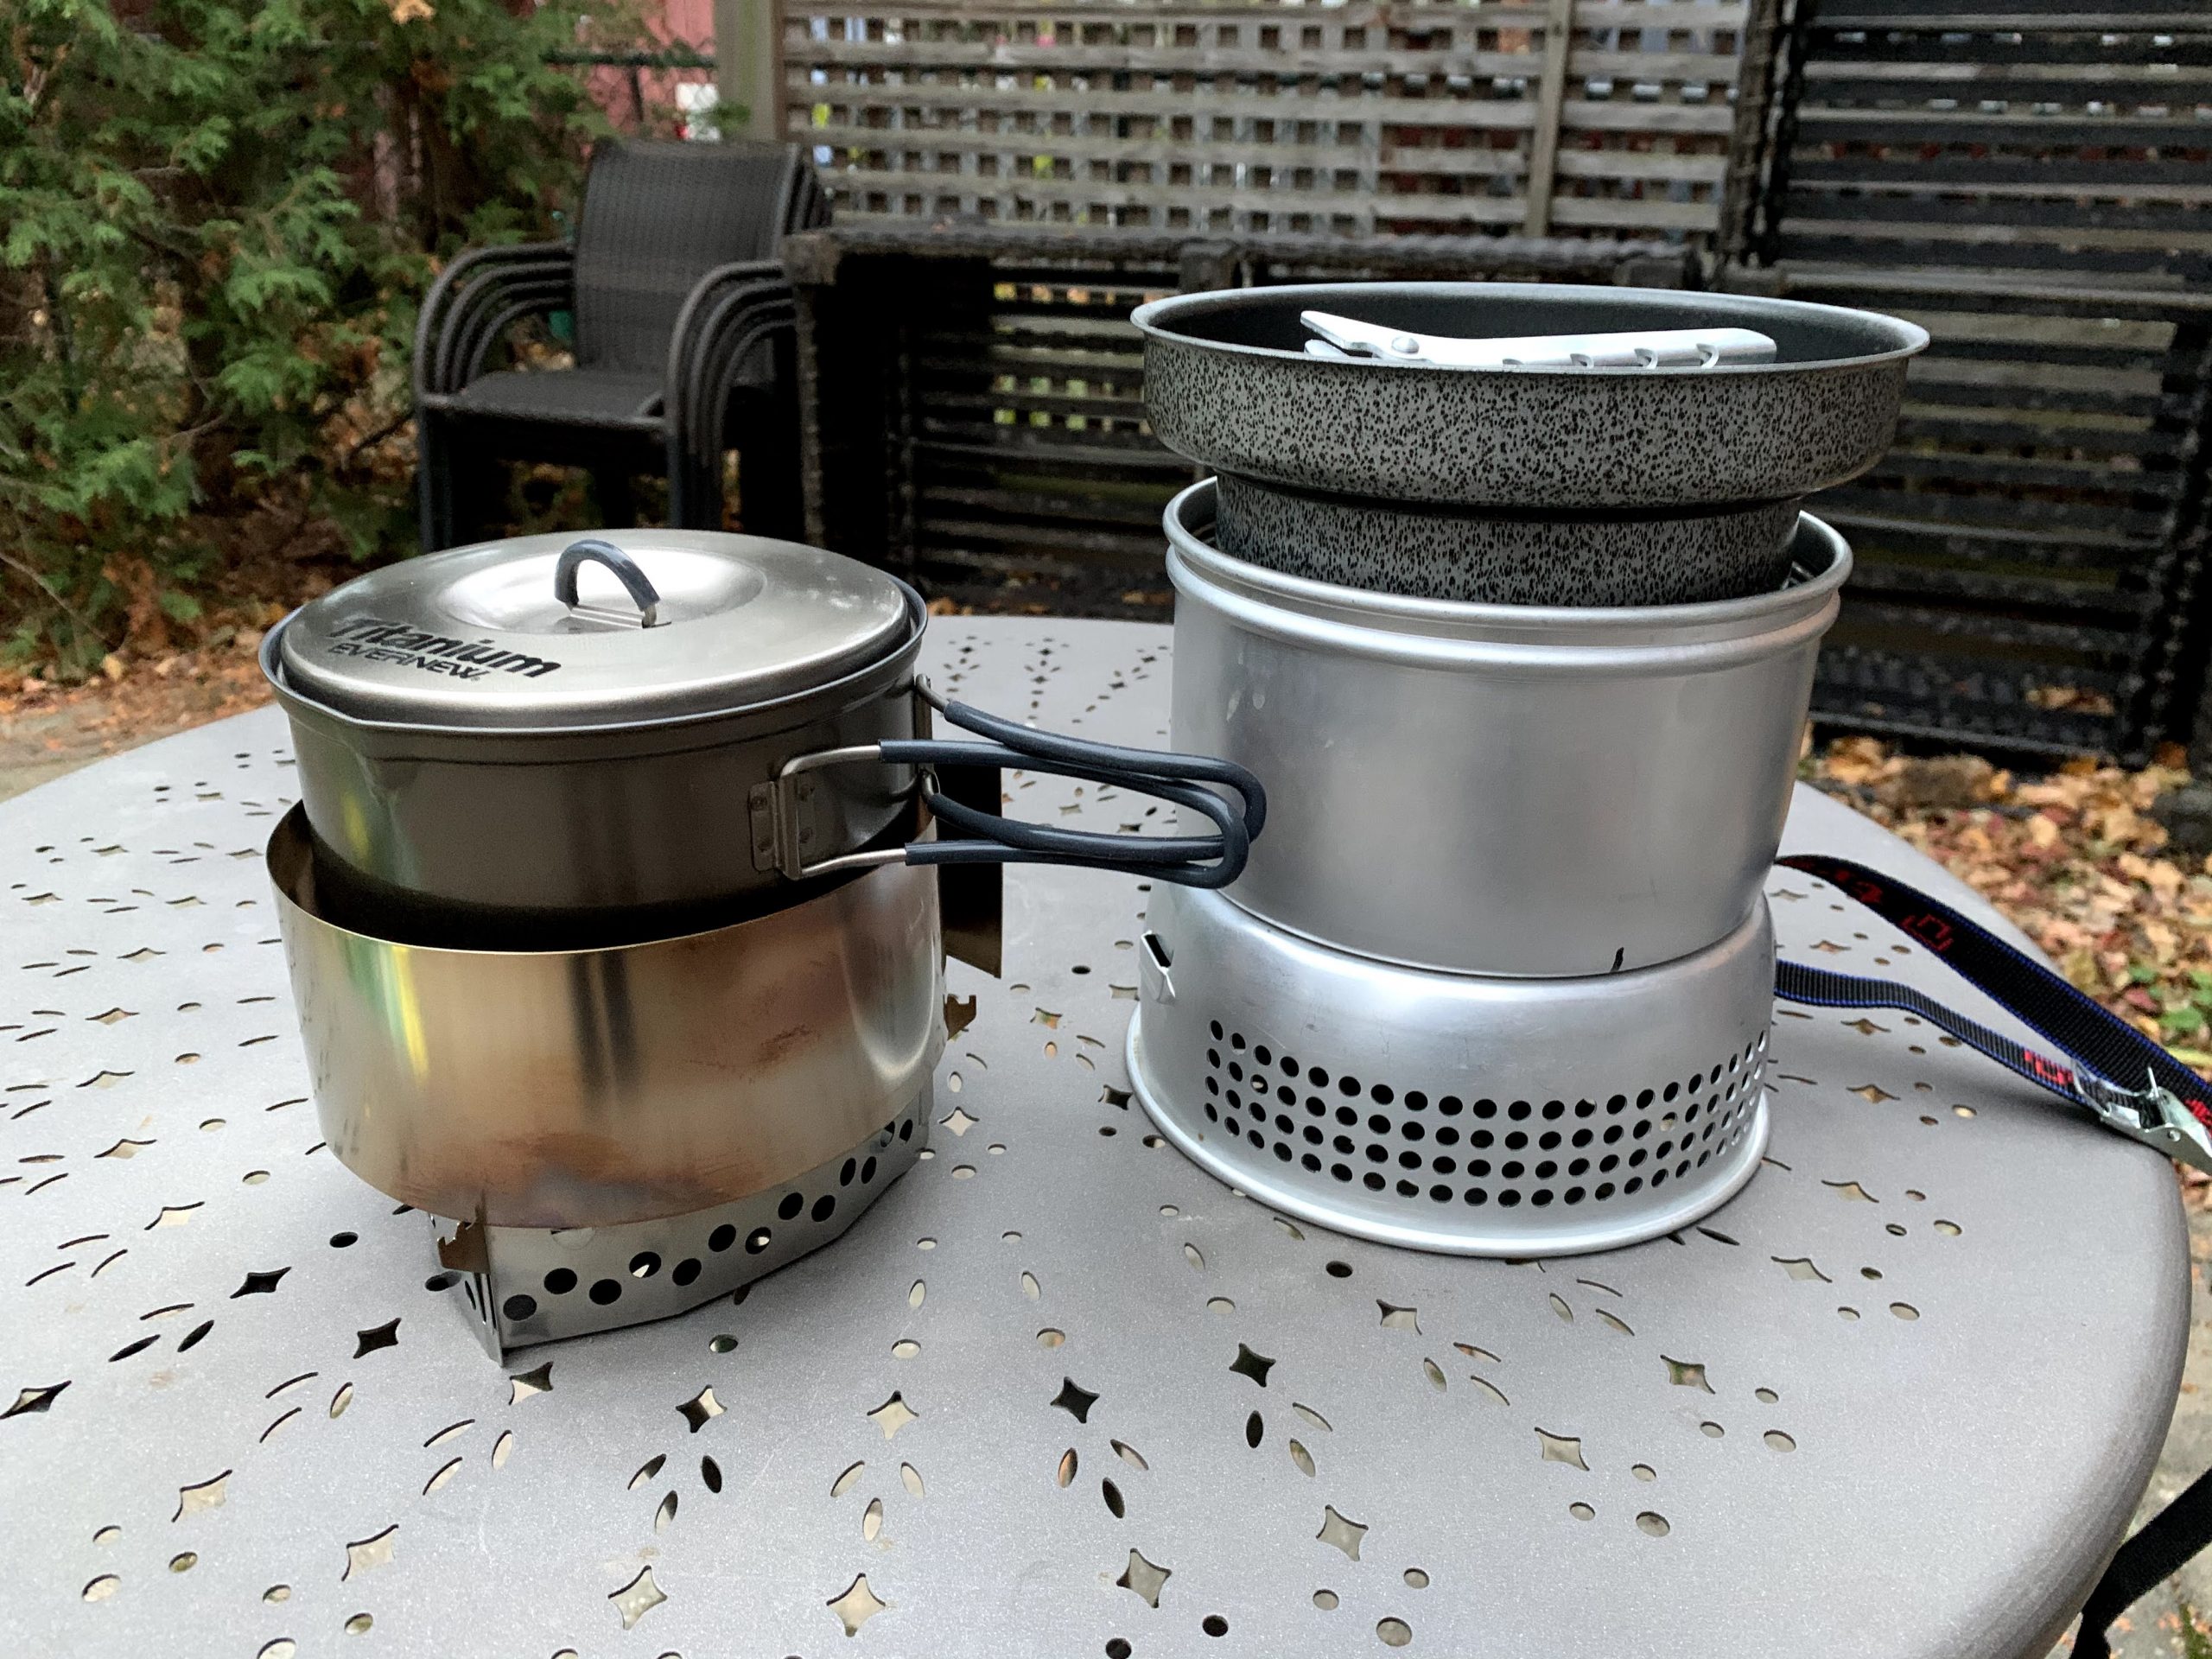
Clikstand Stove vs Trangia 27
From the “Sometimes, I need to get things out of my system” dept. I go through these really intense periods of time where I obsess about a specific subject. Some common themes include cycling, computer networking, and camping stoves. I’m…
-
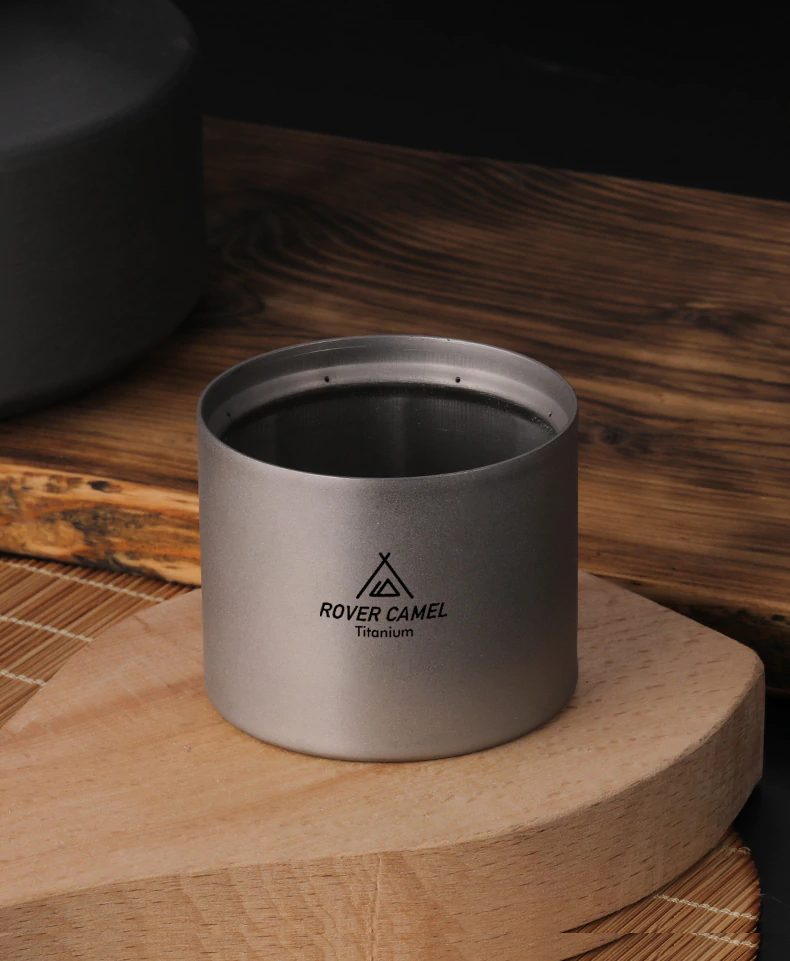
Titanium Siphon Stove
As much as I love the Trangia cooking system, if you are by yourself and just need to boil water, there are lighter tools that can be used. I mentioned some alternatives in my previous post: Toaks Siphon Stove (22…
-

Trangia Stoves: In appreciation of good design
Every week I sit with the design team at Nulogy to run a critique session on their work but I have since started a new tradition of icebreaker questions for the team to improve shared understanding at the personal level…
-
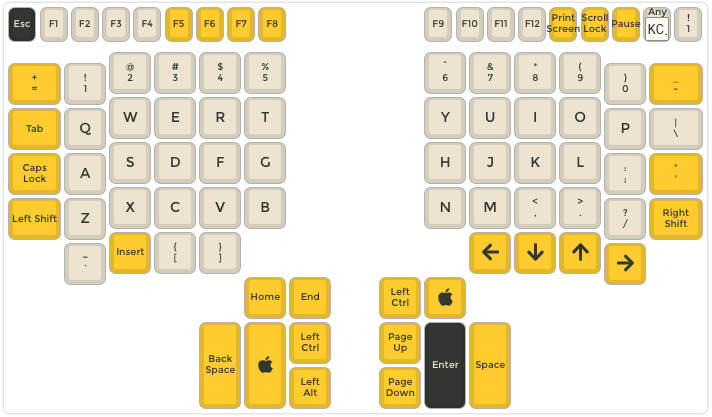
Remapped Mac keyboard shortcuts on Kinesis Advantage and Contoured Keyboards
In Part 3 of my journey in learning to type on the Kinesis Contoured / Advantage line of keyboards, I decided to document how the layout and split design has affected my keyboard workflow as well as my current solutions.…
-
First Impressions with the Kinesis Contoured Classic QD (KB133PC/QD)
[Update – 2020/02/29] – Leap Day update. I was able to repair the leads on flex circuit board using the conductive paint that I picked up at Canadian Tire. The ESC key works 100% now. I had wanted to lower…
-
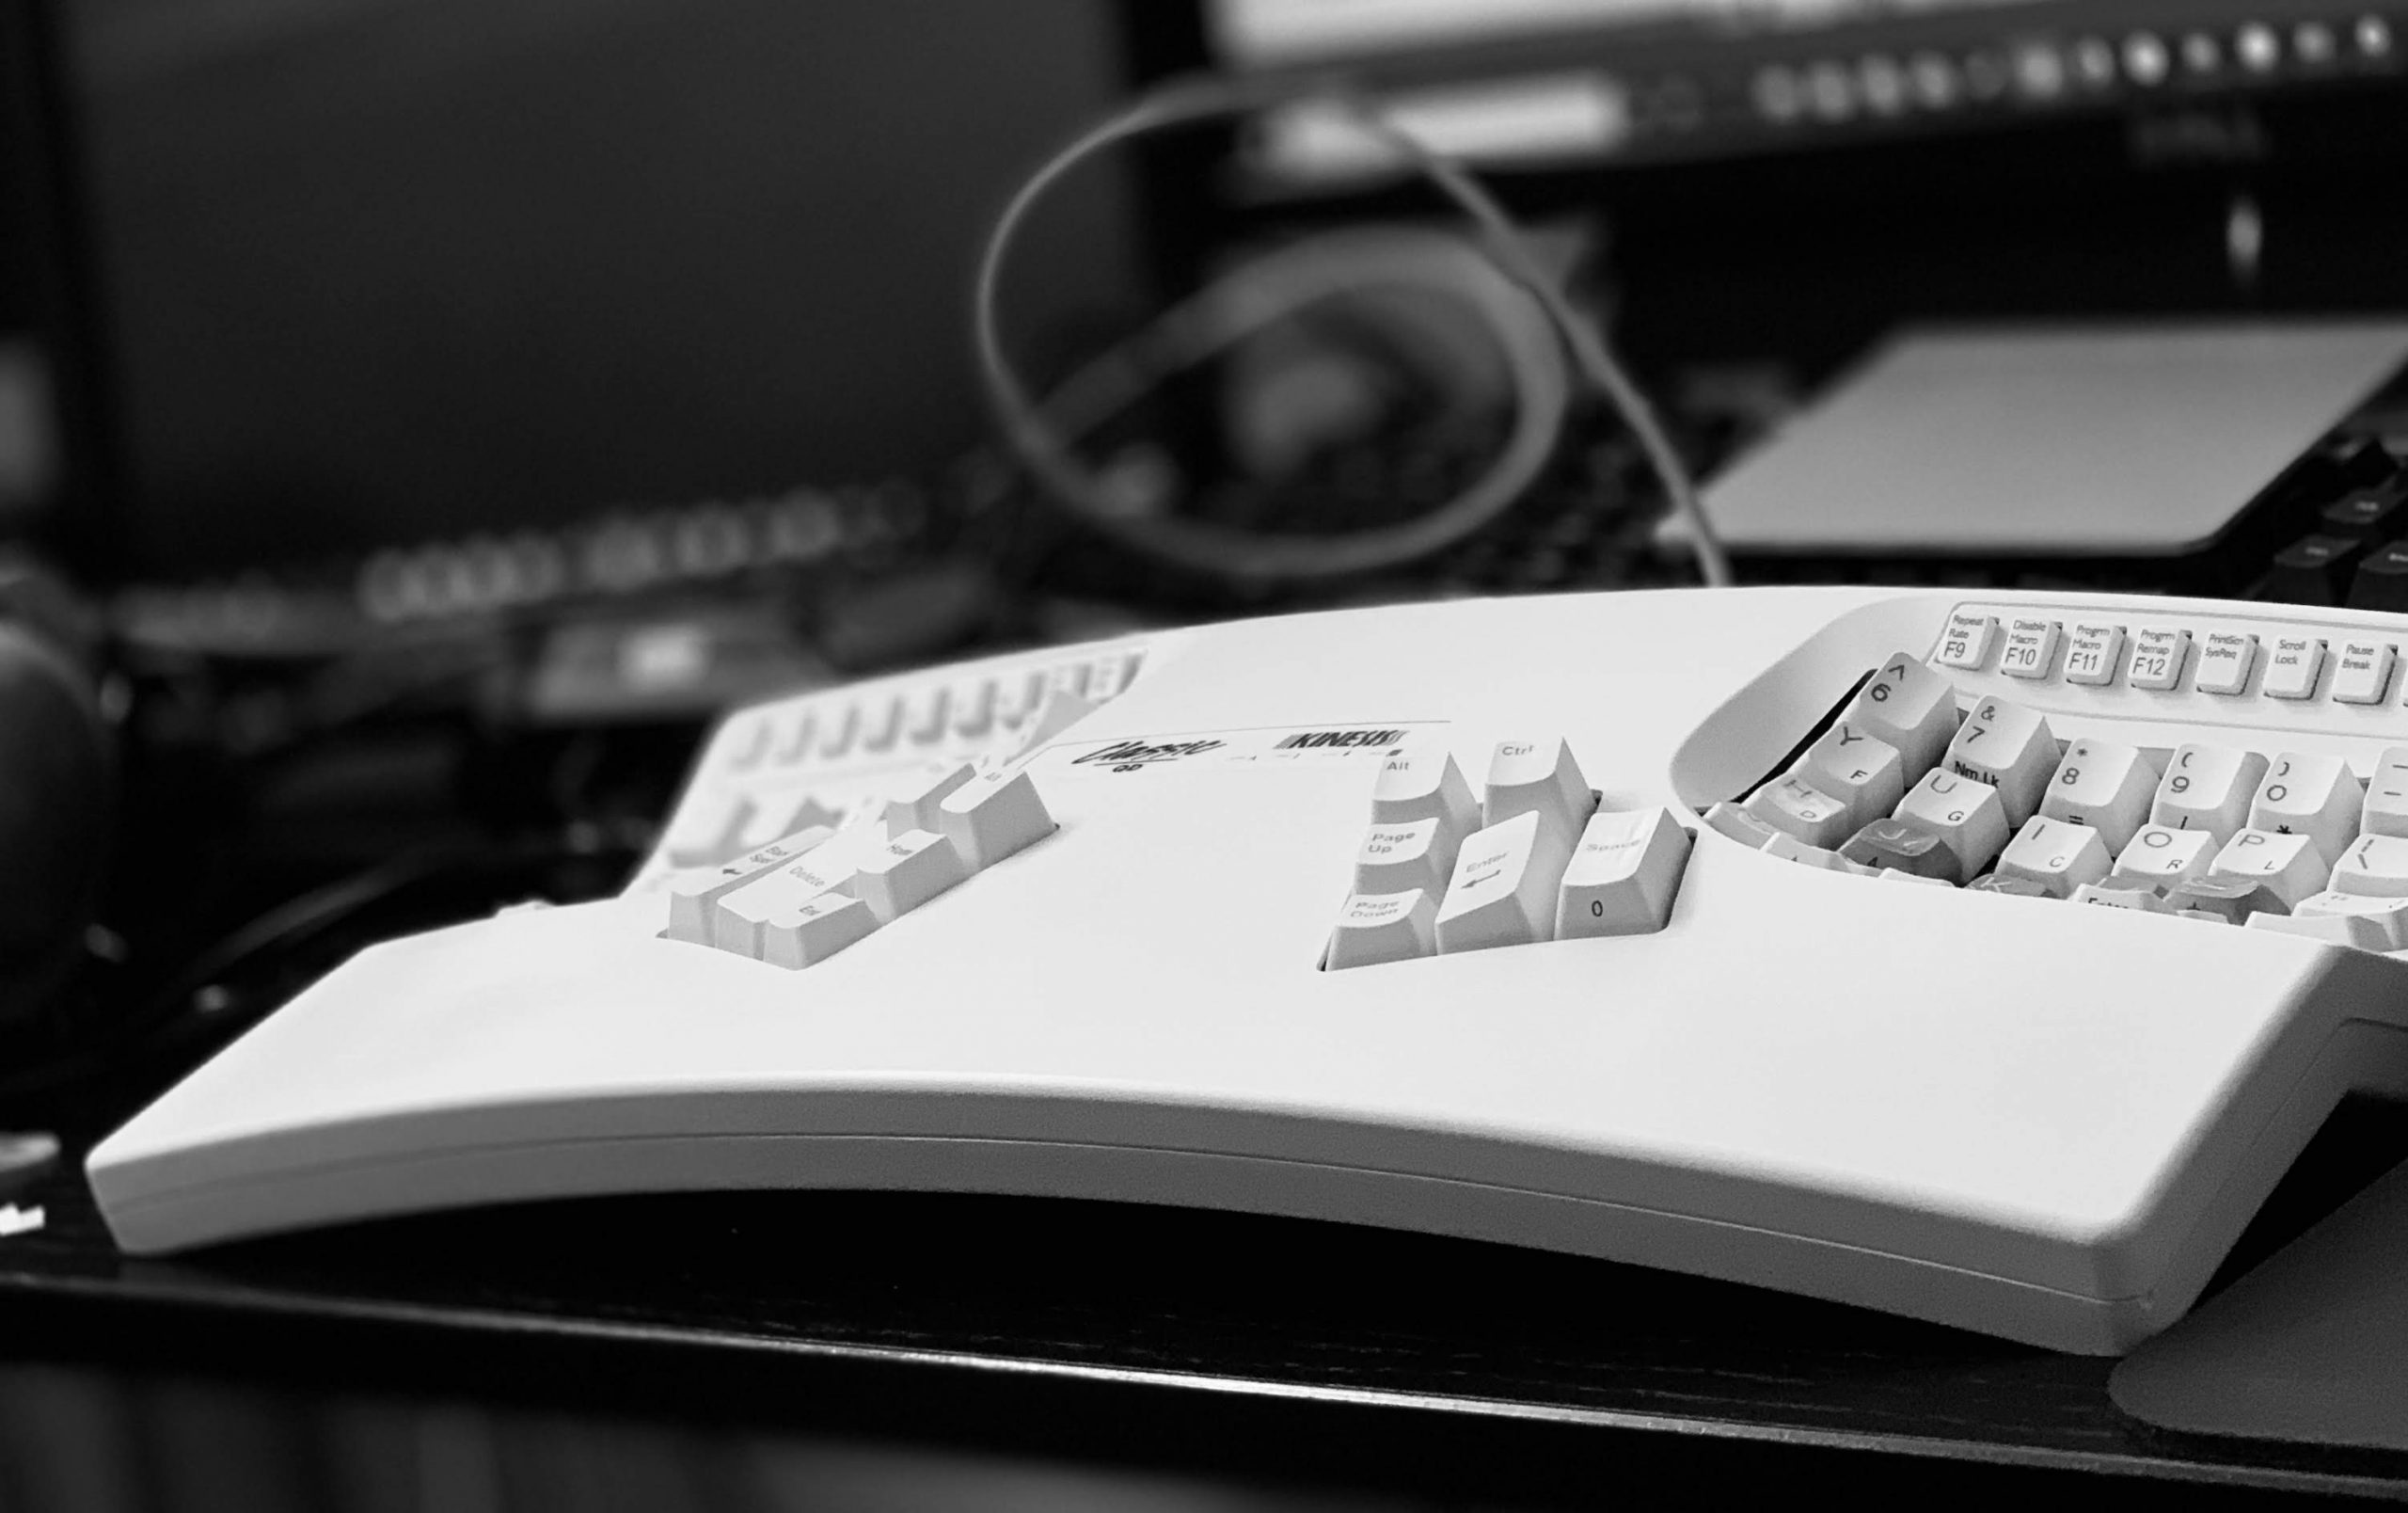
Kinesis Contoured Classic QD (KB133PC/QD)
So one of my co-workers at Nulogy upgraded his aged Kinesis Classic QD. It’s an ancient, PS/2 mechanical keyboard (Cherry MX Brown switches) with combo QWERTY and DVORAK layoutsThey stopped manufacturing these models in 2006. It doesn’t even have a…
-

I’ve been shining my shoes wrong all this time
I’ve owned and abused shoes for decades. As my professional life has on occasion, I’d take out the old kiwi wax polish, buff my shoes and spray them down with whatever water repellent spray I had on hand. This year,…
-

IoT: Does everything need to be in the cloud?
On the Verge reports that Google remotely reset some customers Google OnHub routers: Google has apologized to its Google Wifi and OnHub customers after it inadvertently reset a number of routers to their factory settings. Google blamed an issue with…